
Have you ever held a blank mask in your hands and felt that mix of excitement and “uh… now what?” Trust me, you’re not alone. Mask painting looks complicated from the outside, but once you start, it becomes one of the most fun and freeing crafts you can do.
It’s perfect for kids, adults, parties, classrooms, girls’ nights, or even a relaxing solo project at home. Best of all, masks don’t ask for perfection, they just want your imagination.
Painting on a 3D surface can feel scary at first, but the trick is to take it slow and enjoy the curves of the mask. Every brushstroke adds personality, and your final piece can be as simple or dramatic as you want. You can go whimsical, elegant, spooky, glamorous, or downright silly. The sky isn’t even the limit here!
So take a deep breath, grab your paints, and keep reading, these ideas will help you explore, experiment, and create a mask that feels uniquely you.
Key Takeaways
- Mask painting is easier than it looks, start simple and build details slowly.
- You can use inexpensive materials like acrylic paints, markers, and glitter.
- Every idea is flexible; add, subtract, or mix elements freely.
- Mistakes can become creative texture or unexpected design moments.
- There’s no “right way” to decorate a mask, just the way you enjoy most.
#1: Soft Pastel Butterfly Mask

Paint soft pastel wings stretching across the cheeks. Add gentle lines to mimic wing patterns, and blend colors with a sponge for a dreamy look. Finish with tiny white dots for detail.
Pro tip: A touch of glitter along the edges makes it feel magical.
#2: Galaxy Night Sky Mask

Paint the entire mask in deep blues and purples. Use a sponge to tap in lighter spots for nebula clouds. Add stars with a splatter brush or toothpick. Planets or tiny shooting stars make it extra fun.
#3: Flower Garden Bloom

Paint vines growing from the edges of the mask toward the center. Add little blossoms: roses, daisies, or simple dots shaped into flowers. Leave some white space to keep it airy and pretty.
I love this one for spring parties.
#4: Carnival Glitter Swirl

Draw swirling shapes around the eyes, then fill them in with metallic or glittery paint. Make each swirl a different color or stick to one palette. This one always feels festive and joyful.
#5: Fierce Tiger Stripes

Start with an orange base coat and lightly blend yellow into the center. Add bold black stripes with a small brush. A white nose bridge gives it that iconic tiger look. Kids adore this idea!
#6: Minimalist Line Art Mask
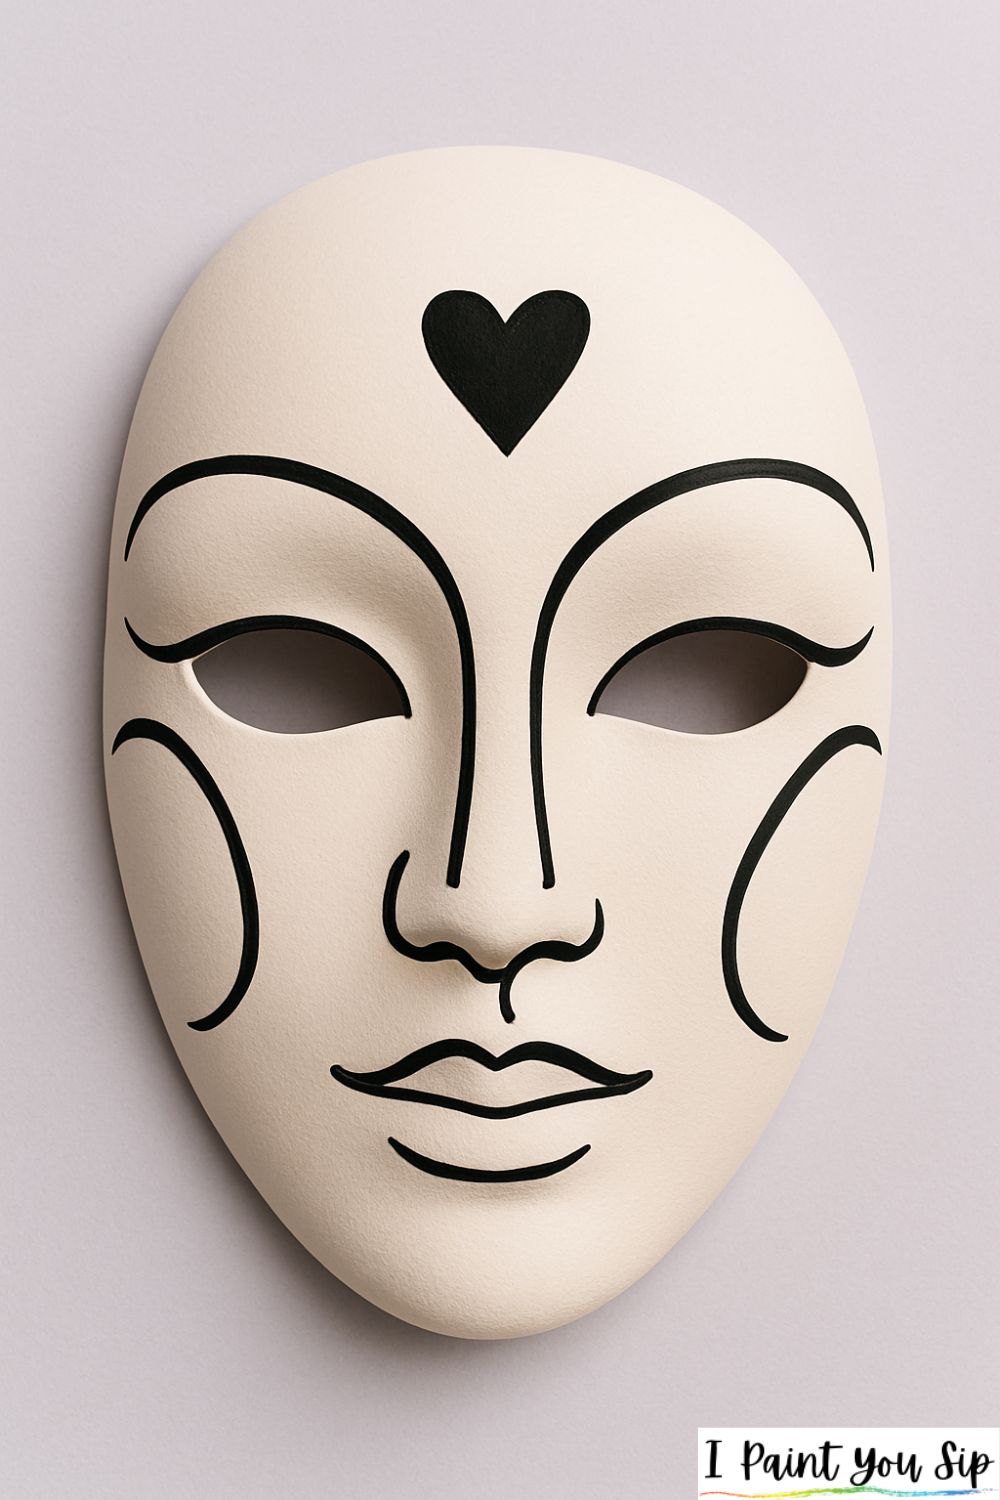
If you prefer simplicity, draw curved lines around the eyes and cheeks using black paint or marker. Add a single shape like a heart or star to anchor the design. It’s clean, modern, and very chic.
#7: Rainbow Drip Mask

Paint vertical rainbow stripes across the top edge. Pull each stripe downward with a wet brush to create a dripping effect. The messy look is the magic here, let the paint do its thing.
#8: Masquerade Lace Design

Use thin brushes to draw delicate lace patterns across the eyes and cheeks. Add tiny dots and scalloped edges. It looks incredibly detailed but is mostly repeating simple shapes.
#9: Ocean Wave Breeze

Blend blues and greens across the mask like rolling waves. Add white curling foam lines for movement. A small starfish or seashell detail brings it together.
#10: Sunset Horizon Mask

Paint a soft gradient from yellow to orange to pink. Add silhouettes of birds or tree branches along the edges. This one looks surprisingly professional with minimal effort.
#11: Confetti Party Mask

Paint the base white or pastel. Then use a round brush or the end of a pencil to dab colorful confetti dots all over. It’s cheerful, easy, and perfect for beginners.
#12: Steampunk Gear Mask
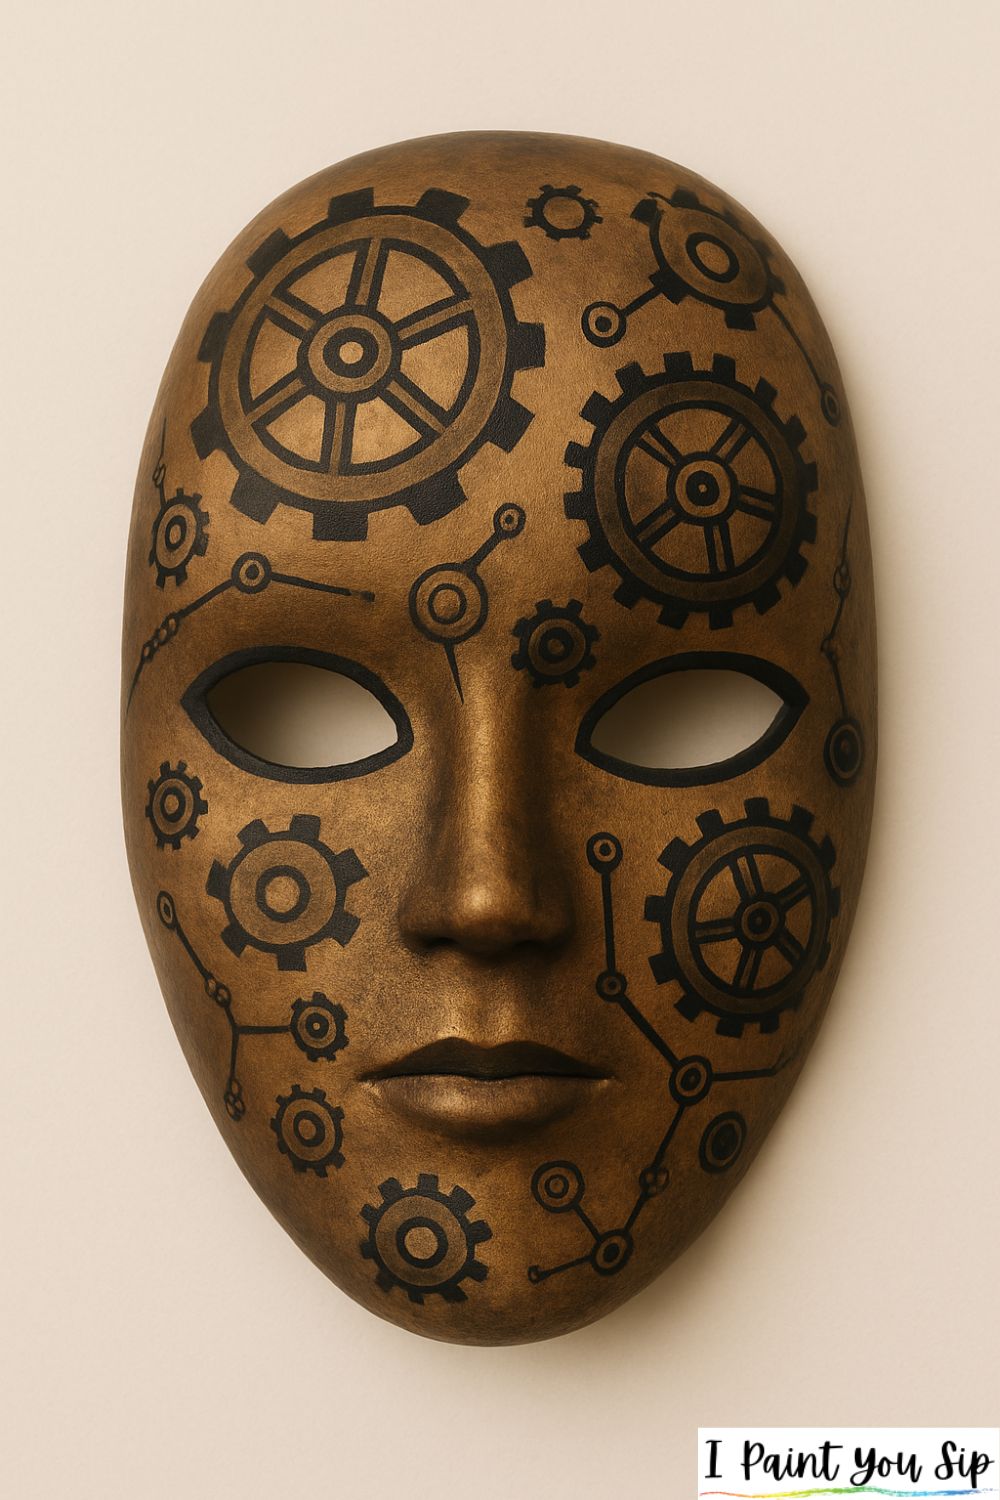
Paint a metallic base, bronze or copper works great. Add gears, bolts, and mechanical shapes in darker tones. Smudging brown around the edges gives it a worn, antique feel.
#13: Moon & Stars Duo Mask

Paint one side deep navy and add stars; paint the other side pale yellow with a soft glow. A crescent moon over one eye is a sweet finishing touch.
#14: Gentle Fairy Mask
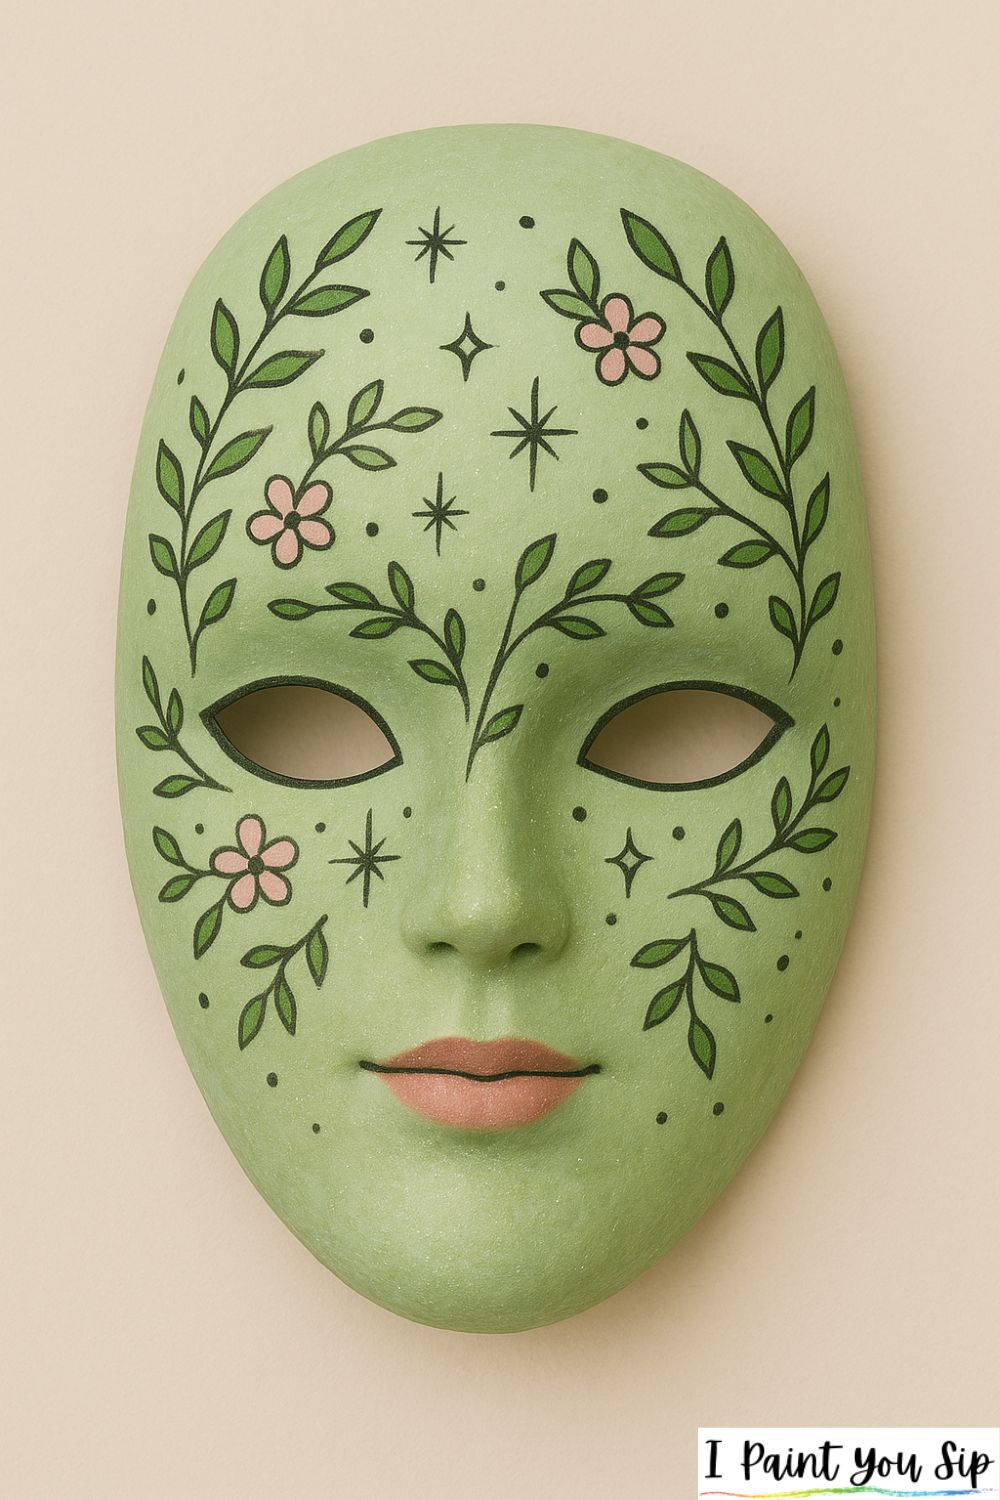
Use pastel greens and soft pinks. Add tiny leaves and sparkles around the eyes. Finish with a dusting of shimmer. This one feels earthy and whimsical.
#15: Bold Pop Art Face

Paint thick black outlines around features like the lips and nose. Add bright blocks of color and maybe a comic-style tear drop. It’s playful, dramatic, and great for photos.
#16: Woodland Forest Creature
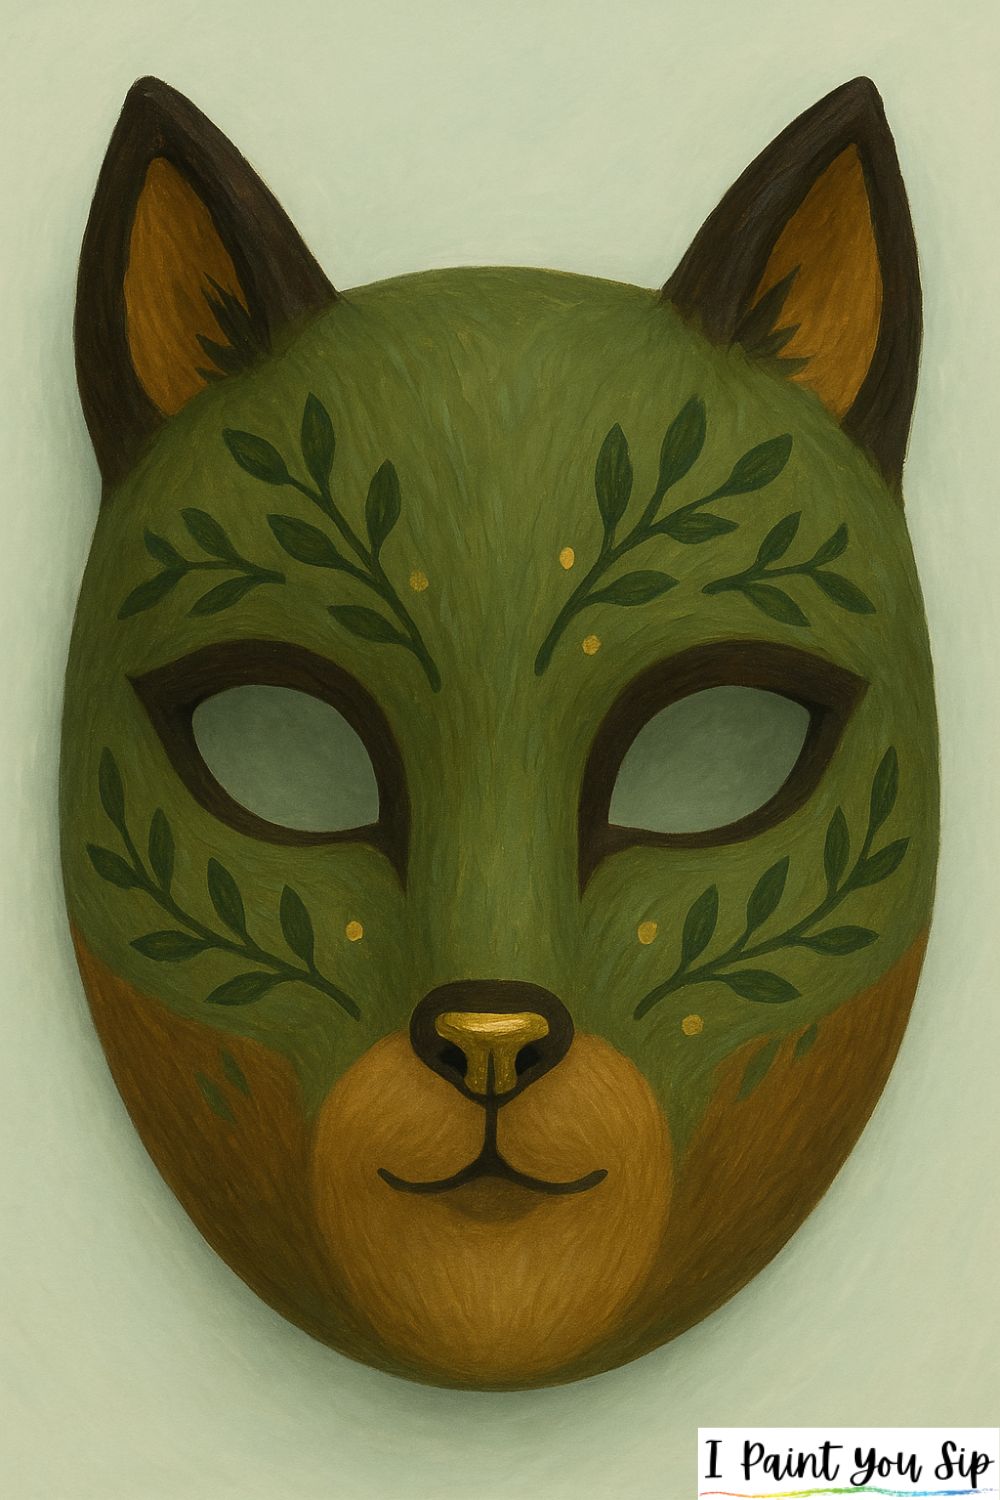
Think browns, greens, and little touches of gold. Paint subtle leaf shapes or branches across the cheeks. A small nose detail makes it extra cute for kids.
#17: Fire & Ice Split Mask

Paint one half in cool blues and icy cracks; paint the other half in fiery oranges and reds. The contrast creates a powerful, eye-catching design. You can keep details simple but bold.
Conclusion
Mask painting is one of those creative adventures where you truly can’t mess up. Whether you go minimal, dramatic, cute, or mysterious, every design teaches you something new about color, texture, and flow. Even little “oops” moments can turn into cool shading or unexpected patterns, so let them happen and see where they lead you.
If you’re feeling energized after trying these ideas, explore other fun surfaces next: plant pots, mini canvases, tote bags, wooden signs, or even rocks from your garden. Each new surface gives you a chance to play and grow as an artist.
Most importantly, remember this: creativity belongs to everyone. You don’t need fancy tools or years of experience. Just curiosity, courage, and the willingness to try. Your next masterpiece might be just one brushstroke away.
Jessie has a passion for bringing people together through creativity and socializing. She has organized many painting events that have left guests with lasting memories and new friendships. She’s also been to various sip events to unleash her own creativity and connect with like-minded individuals.