Are you considering trying soft pastels for some of your art projects? A lot of people are afraid to try using soft pastels for a couple of reasons.
First, they are worried that they do not have drawing skills. Don’t worry about this, because you don’t necessarily need to be able to draw using soft pastels (you will see this from the three types of pastel drawing ideas for beginners I will share later in this post).
Second, unlike paint, you can’t blend colors on a palette. With soft pastels, you will need to do all of your color blending right on the paper.
Today I am going to talk about a few different soft pastel techniques, surfaces to draw on, and how to use fixatives. Then I will give you some examples of easy oil pastel drawing ideas for beginners.
Let’s get started!
Why Use Soft Pastels?
Soft pastels are a great medium to work with. Because they are soft, it is easy to blend colors to create vibrant shades that almost have a paint-like appearance.
You can get quite creative when using soft pastels. Plus, unlike with paint, soft pastels are easy to use on the go, or as some artists like to say, plein air.
When you work with soft pastels, all you need is a set of about a dozen or so colors and some pastel paper. You can also use other types of paper or other surfaces, which I will discuss later.
3 Drawing Ideas Using Soft Pastels You Can Try
Now that you know about a few techniques for soft pastels, and how to protect your finished drawings, it is time to check out three of my favorite soft pastel painting ideas for beginners: landscapes, sunsets, and tonal skies.
#1. Soft Pastel Landscapes

Some beginners think that a landscape is too difficult, but it is one of the easiest drawings for beginners. Yes, you will be using many shades, but once you get started you will find that creating a landscape is fun and easy.
I suggest keeping your first couple of landscapes simple. Rather than worrying about a lot of details, concentrate on learning how to color with soft pastels as well as other techniques.
One of my first soft pastel landscapes was a scene that incorporated a path, trees, water, and mountains. Every artist has their own method of doing landscapes. I like to work in sections.
I started with the water and sky. Then I added a path with a fence and trees, followed by some mountains in the background.
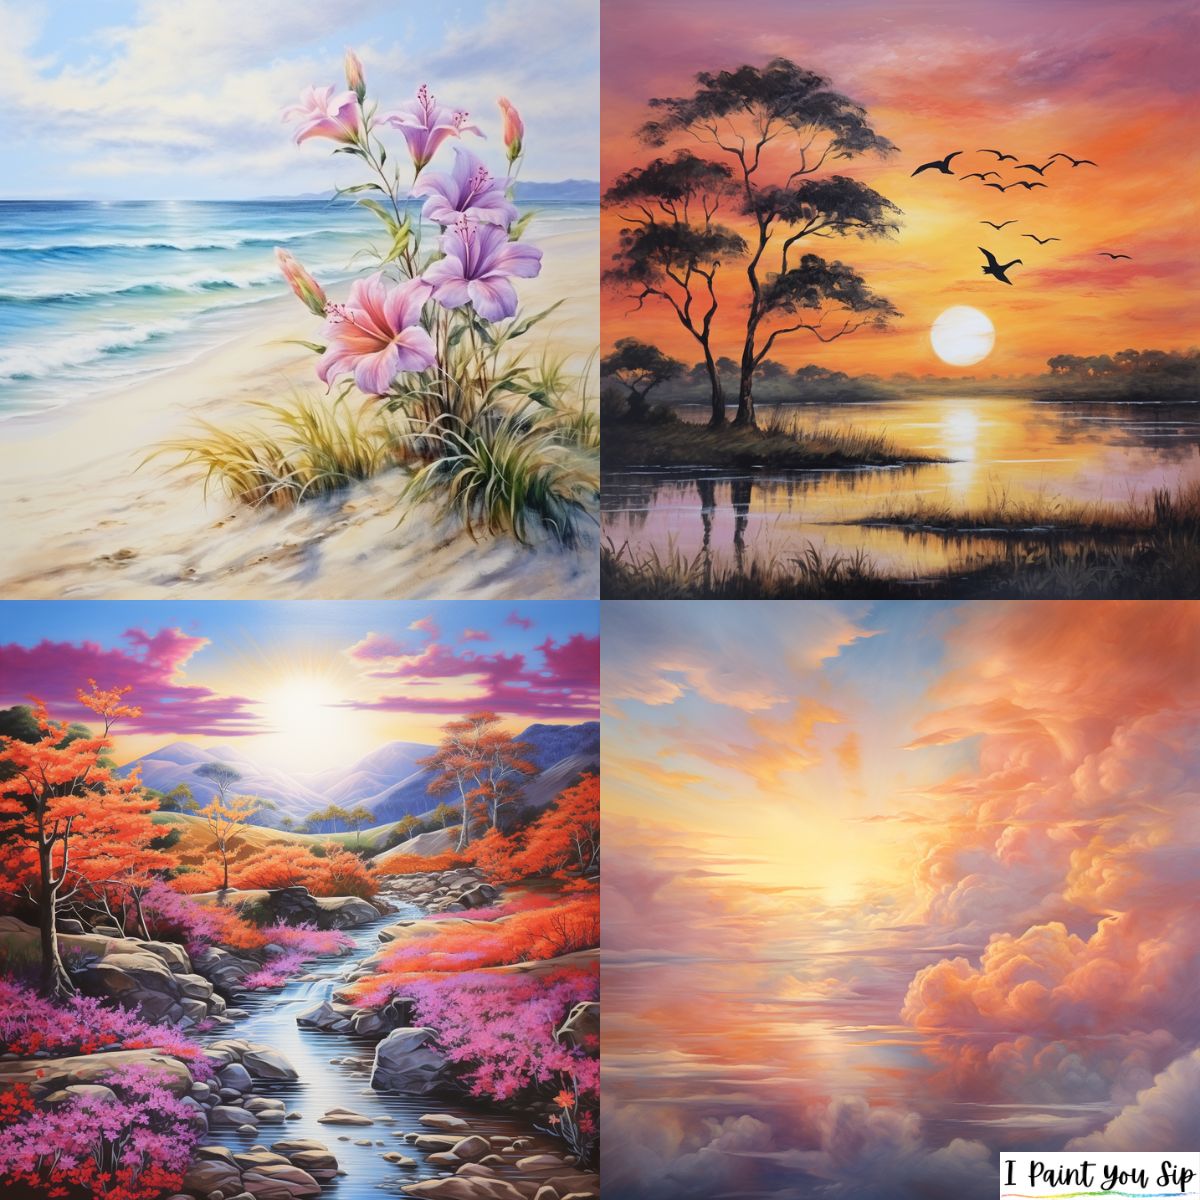
#2. Sunset Silhouettes
Another easy soft pastel drawing idea for beginners is a sunset with a silhouette. This type of drawing allows you to create something beautiful without having to concern yourself with a lot of details.
I like to use black pastel paper for this type of soft pastel drawing. Leave the bottom couple of inches of the paper black.
Use shades of yellow, orange, and red. For my first sunset, I only used one shade of each color and then I blended the colors with my fingertips to create a smooth gradient.
Start at the bottom with yellow, then add orange above the yellow and red above the orange. Blend the colors to create a gradient, and then add an orange sun in the yellow section.
Take a black soft pastel crayon and use it to create grass, wheat, trees, etc to create the silhouettes.
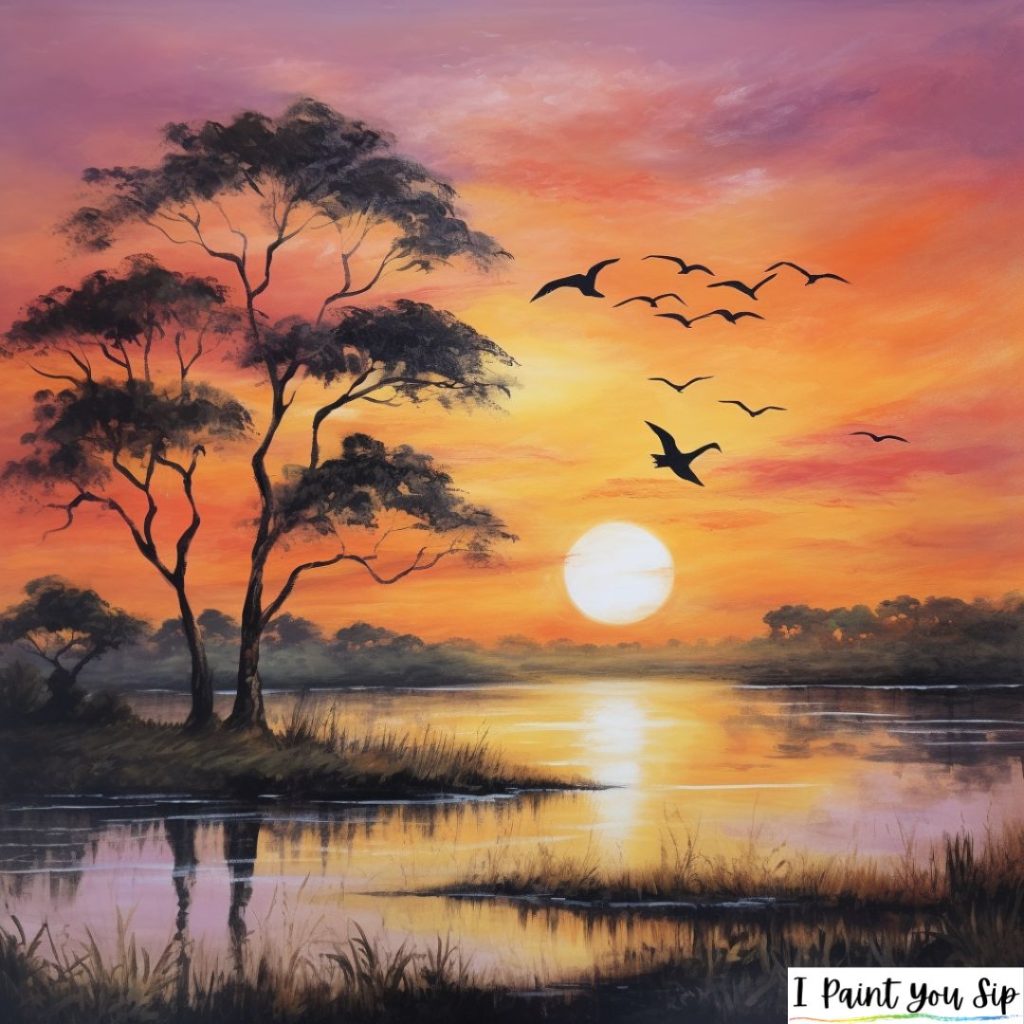
#3. Tonal Sky
This is an ideal choice for beginners because you don’t have to do any drawing unless you want to. All you have to do is blend shades of light blue, pink, and yellow to create a tonal sky.
If you want to add some detail, once again I suggest creating silhouettes. Simply use your black soft pastel to create a few simple birds flying in the sky.
Soft Pastel Techniques for Beginners
There are many techniques artists can use with soft pastels. I don’t want to overwhelm you with too much information, so today I am going to discuss three basic techniques to get you started.
#1. Side Stroke
If you want to color a large area, the side stroke technique is a great way to do it. Start by holding the pastel on its side. If there is paper around the pastel crayon, you will need to remove it.
You can use square or round pastels for this technique. I find square pastels work best. Use a light touch to gently sweep the soft pastel over the paper to create a background for your drawing.
#2. Blending
One of the great things about using soft pastels is that they make it easy to blend colors. All you have to do is layer colors.
Start with one color, and then color over the top of this shade with another color. You will notice that the colors start to mix right before your eyes!
You can use tools to create smooth gradients, smoky or foggy effects, and more. You can even use your fingers to blend the colors, or you can use a pastel brush that is specifically made for this purpose.
I like to play around with different tools for blending. I have used paper towels, sponges, and even Q-Tips for blending soft pastels.
#3. Dusting
Let’s say you want to add some texture to your picture. Or, maybe you are creating a galaxy and you want to add some stars. Dusting is a great technique to use for both purposes.
Use your fingernail or a knife to scrape some of the pastels onto the paper. This will create specks of dust all over the paper.
Once you have sprinkled the dust onto the paper, use your finger to press the dust into the paper. Otherwise, it is just going to fall off.
Best Surfaces for Soft Pastel Drawings
When you used pastels as a kid, you probably were using whatever type of paper you could get your hands on. In most cases, you likely would have been using smooth paper.
While you can use smooth paper, it is best to use a surface that has a bit of tooth (surface texture). This is going to give the soft pastels something to adhere to.
I like to use pastel paper, and I have also used watercolor paper for soft pastel drawings. Look for acid-free paper. This paper has archival quality, and you will be able to enjoy your finished drawings for many years to come.
Protecting Pastel Drawings
One of the biggest drawbacks to using soft pastels is the fact that they can smudge easily. Luckily there are ways you can prevent this from happening.
You can protect your soft pastel drawings in a couple of ways. Many artists like to use a soft pastel fixative.
All you have to do is spray the surface of your finished soft pastel drawing and it will be protected from smudging and moisture. You can also get fixatives that will protect your work from the effects of UV light.
If you want to have separate layers without mixing colors, you can also use spray fixative between the layers.
Another way to protect your soft pastel drawings is to frame them behind glass. Never allow the glass to come into direct contact with the drawing, because it will cause smudging.
Instead, use a mat for your soft pastel drawing. This will create a bit of space between the drawing and the glass.
Conclusion
I hope you have lots of fun trying these three easy soft pastel drawing ideas for beginners. These drawings will help you to learn a few different techniques that you can use for other soft pastel drawings. Don’t be afraid to experiment!
See more:
Sari Green is a semi-professional artist and professional writer. She has been hosting paint & sip parties for the past couple of years, and truly enjoys helping other people to create their very own masterpieces. She loves to create, and you never know what she’s going to come up with next!