Key Takeaways
- Work from Dark to Light: Start your artwork with darker tones and gradually build up to lighter colors. This helps create depth and prevents light colors from being dulled.
- Keep Layers Light: Apply pastels in thin layers to preserve the paper’s texture and allow for additional layering. Too much pastel can clog the surface and lead to flaking.
- Use Blending Tools: Use paper stumps for detailed blending and sponges for broader areas. While fingers can work, tools offer more control and cleaner results.
- Break Your Soft Pastels: Breaking pastel sticks into smaller pieces can give you sharper edges for detail and more versatility in application
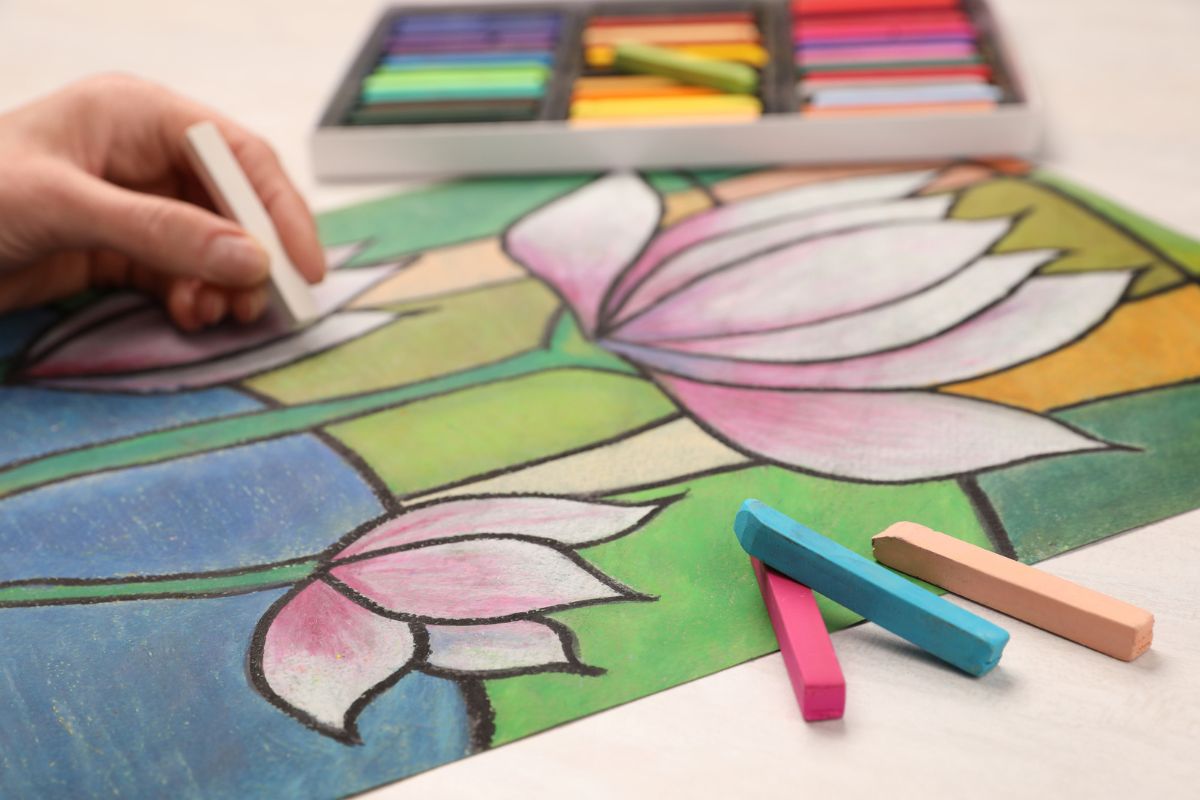
Soft pastels are color pigments in a dry medium. These pigments are mixed with water and a little bit of binder to create pastel crayons in a variety of sizes and can range in softness.
Creating art with soft pastels is fun, and it is a great medium for beginners. While you can’t mix the colors on a palette as you would with paint, you can blend colors right on the paper to achieve an unlimited color palette.
Today we are going to take a look at some of the best soft pastel techniques for beginners to try. Once you get the hang of these techniques, you can move on to others that are more difficult and increase the depth and beauty of your art.
Continue reading if you want to learn more about beginner soft pastel techniques.
There are so many techniques for working with soft pastels that it would take a whole book to talk about all of them. Most articles discuss things like blending, cross-hatching, etc.
Today I am going to discuss some other techniques that aren’t always mentioned. These are techniques that every artist needs to know if they want to create amazing art with soft pastels.
#1. Work From Dark to Light
If you have worked with acrylic paints, you know that you should be working from dark to light. It is the same with soft pastels.
There are two reasons why you need to work from dark to light. First, if you want to layer colors, it just won’t work if you start with lighter colors.
Let’s say you have created an image that has a lot of white, and you want to make it a bit darker. Try going over the white with a darker soft pastel, such as black or dark brown.
You will end up with little to no change in the shade. The darker color will simply skim over the lighter color, and you will still be able to see that lighter color.
Then, you will have to take an extra step to scrape off the color from the entire section and start all over again. If you are anything like me, you want to finish your pastel drawings quickly, but this won’t be the case when you have this added step.
When you work from dark to light, you can build depth in your drawings through the various layers. For instance, if you are creating flowers, to get a realistic effect you will need to start with the darkest shade and work your way to some white highlights.
How dark the shades you begin with will depend on what you are drawing. If you are drawing a white cat, you wouldn’t want to start with black.
Instead, start with a shade of grey, followed by lighter shades of grey until you are left with only a white layer to add. This is going to make the fur look more realistic, and it will give your drawing some depth.
#2. Keep Your Layers Light
When I say keep your layers light, I don’t mean that you should only use light colors. This means that you want to create thin layers of pastel colors, at least for the first few layers.
The reason for this is that you don’t want to create a smooth surface. If you start with heavy layers, you are going to end up filling in the tooth of the paper.
The paper then becomes oversaturated, and it won’t be able to hold the rest of the colors you will be using for your drawing. Also, creating heavy layers can cause the pastel to flake off the paper so you would end up losing a lot of your work.
You can use a spray fixative between layers to prevent this, but I don’t recommend this for beginners. It is best to start by learning how to use soft pastels the right way rather than cheating by using a fixative.
Also, using a fixative will cause the vibrant colors to look quite dull, and it could leave unwanted marks on your drawing.
#3. Use Blending Tools
There are many techniques you can try, using blending tools to achieve them. For instance, if you want to blend small areas, using your finger or a piece of paper towel or sponge likely won’t work.
Instead, use a paper stump. This looks a lot like a pencil, but it is made of paper. You can even sharpen a paper stump with a regular pencil sharpener.
You will have a lot more control over your drawings when you use a pastel stump, especially when you are working on small details.
When blending larger areas, try using a sponge. This will help you to blend colors until you have achieved a smooth finish.
Keep in mind that sponges don’t work well on rough paper, but they are ideal for regular pastel paper.
One of the most common blending techniques is to use your fingertips. Sure, you are going to get a bit messy, but that is one of the most fun things about being an artist!
Blending with your fingertips works well with thicker layers. You will be able to press the pigment right into the paper, which will allow you to keep marks sharp and visible.
If you are using this technique, it works best with pastel paper, which is smoother than watercolor paper.
Here are some soft pastel ideas to help you get started.
#4. Break Your Soft Pastels
Many beginners think that they need to keep their soft pastel crayons whole to use them. But, you might be surprised at some of the effects you can achieve with smaller, odd-shaped pieces of soft pastels.
Think about this. As you use your pastels, they are going to get smaller and smaller. You are still going to use them when they are small, so it doesn’t matter if you break them up into smaller pieces.
When you break pastels, you will end up with sharper edges at first, which is ideal when you want to create details. As you use them the edges will dull so you can go in later and add colors and shading.
One thing to keep in mind is that some soft pastels are softer than others. You may find that the softest of the soft pastels will simply crumble instead of breaking into chunks.
Don’t worry about this. You can still use the crumbled pieces to create some interesting effects.
Conclusion
The techniques I have talked about in this post are ones that I use quite often. I don’t like to limit myself to the most common techniques.
Rather, I enjoy experimenting and trying all kinds of different techniques to create shading, depth, and texture in my pastel drawings.
Try these techniques in addition to some of the more common ones, and you will find that you are much happier with your finished artwork.
See more:
Sari Green is a semi-professional artist and professional writer. She has been hosting paint & sip parties for the past couple of years, and truly enjoys helping other people to create their very own masterpieces. She loves to create, and you never know what she’s going to come up with next!